Silverlight and the VisualStateManager
| CommentsIf you’ve heard the news about Silverlight 2 Beta 2 and Expression Blend 2.5 (June 2008 preview), you will notice something else in addition to being able to skin your controls easier. Remember how you may have had to create different states for your element using “MouseOver State" and then create storyboards to transition to states? There’s now a better way.
Enter VisualStateManager.
Let’s take a look and see if we can simplify this down a bit a basic understanding. Let’s use something that most everyone should be able to relate to with states: Button. A button has MouseOver, MouseOut, MouseDown, etc. states that you can see. Using VisualStateManager and the new UI ability to customize templates, we can make our lives easier.
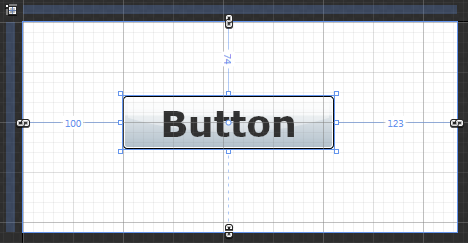
Start in Expression Blend and drop a button on the default design surface. I’ve created mine larger just for context, but whatever you want is fine. You should have something like this:
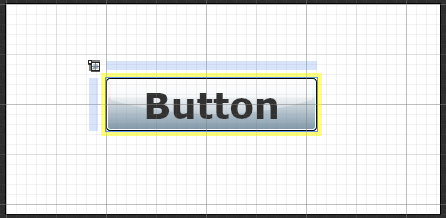
Now, using the method in one of my previous posts about skinning the controls, right-click on the button and choose to edit the template. I’d choose Edit a Copy for now to make things easier for now…keep it a document resource as well. After you’ve done that, take a look in the upper left pallette (assuming default and you haven’t moved your palettes around…in which case you probably already know about VSM and are smarter than me anyway):

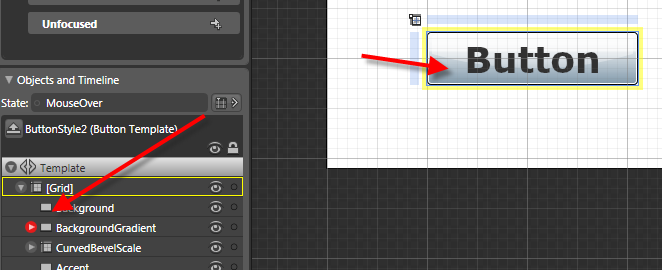
The various states of this control are represented in this particular template. Some other controls might have a blank palette here until some are added, but Button has some default states. As a designer now you can simply concentrate on what the final look of the element (in our case a Button) in each state. Just define the state and what the element should look like in that state. The State palette shows a few things. You’ll notice “Base” as well as two other named containers, “CommonStates” and “FocusStates” which are what are called state groups and containers for different states.
Beneath that you can select a state and see it’s final state. Want to change the MouseOver state, select it in the state palette and start customizing the template. Let’s change the MouseOver state, select it and let’s change some properties. By default it looks like this:
You’ll also notice a few things changed. Basically the design surface goes into Timeline recording mode and a subtle new feature in the objects palette indicating the property being animated/changed…in this case the BackgroundGradient:
I’m selecting the BackgroundGradient element and then changing the color within the Properties palette. Let’s change it to red. There is no need for me to pay attention to any timeline stop points or anything, just concentrate on what I want the final Button to look like, position, etc. in this state:
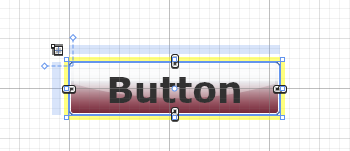
That’s it. MouseOver will now represent my new state. I didn’t have to create any new StoryBoard elements or anything. This is in part where VSM does some magic. You see, the VSM engine bascially knows the beginning end states between any given transition (i.e., Normal –> MouseOver). The VSM engine automatically handles the transition for us. Think of it as creating a dynamic StoryBoard on the fly and executing it. If we run the application and mouse over the Button, it changes to our state.
Notice the time in the state palette for a given state:

This controls the duration of the transition TO that final state.
The VSM model also enables you to move between states via code. VisualStateManager.GoToState() is a static method that enables you to move between states and optionally use the transition or just get to the state. For example if we had our Button named "foo" and had some other event we could do this:
VisualStateManager.GoToState(foo, "MouseOver", true);
The last parameter is to use the transition or not. True would do the transition based on the duration set in that state. False just gets to that state.
The theory is that VisualStateManager now makes it easy for us with our skinning, etc., but also separates more from the developer/designer so that the designer can concentrate on the final look and experience of the final states rather than having to code something up.
A Button used above is a simple example and I hope it helps demonstrate the VSM class available. There could be other uses than the simple Button of course :-) and I hope to see some creative uses. As a for instance, I've seen a lot of applications with slide-out control panel implementations. You could use VisualStateManager and set the "collapsed" and "open" states for a control panel and just concentrate on the final stages of each and let VSM handle the transitions, etc.
For some further designer-driven tutorials on this model, head on over to Nibbles where Celso will have some tutorials on what VSM means to designers in more depth. Also be sure to check out Christian’s blog for more information on VisualStateManager.
Hope this helps!
Please enjoy some of these other recent posts...
Comments